ODBC connection wizard
The creation and configuration of the ODBC connection, of the database file and of the related table can be performed by the wizard available in the ODBC configuration window. The autocomposition uses the data entered in the configuration fields to automatically generate the required elements.
To use the guided connection, proceed as follows:
- In the main window of the Data Logger configurator select the Archive tab and enable logging in ODBC format, as described in this chapter.
- Then select the Sampled Items tab, and define the items to be sampled, taking care to specify a name (unique) for the target DB field.
- Select the Archive tab again and access the ODBC data source configuration window by clicking on the ODBC [...] button. The system displays the Sampling via ODBC window..
- Fill in all the fields in the Sampling via ODBC windoww ith the desired values. The meaning of the configuration fields has already been addressed in paragraph 2.1 of this appendix.
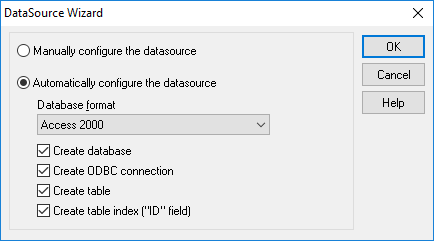
- Selecting the Manually configure the datasource option and clicking OK will simply start the Windows ODBC connection configuration tool. To take advantage of automatic creation, select the Automatically configure the datasource option and select the options you want, shown below, then click OK to start autocreation.
Options available for automatic data source configuration:
|
Archive Format |
Specifies the format of the data store to be created or of the existing data store to connect to. Currently, the autocomposition only supports these formats:
|
|
Create archive |
Selecting this box creates a new database with the name specified in the Database field of the Parameters tab in the ODBC sampling configuration window. |
|
Create ODBC connection |
Selecting this box creates a new ODBC connection to the database specified in the Database field of the Parameters tab of the ODBC sampling configuration window. The connection name is the name specified in the DNS field of the same window. |
|
Create the table |
Selecting this box creates a new table whose name has been specified in the Table field of the same window. |
|
Create the index for the table ("ID" field) |
Selecting this box creates an Index field called ID in the table above. |